Relationship / Beginner
Scatter Plot
Explore relationships between two variables.
Interactive Chart Preview
JAVASCRIPTEdit the column names and values to update your chart. Changes stay in this page until you reload.
| Row# | Group | X coordinate | Y coordinate | Remove row |
|---|---|---|---|---|
| 1 | ||||
| 2 | ||||
| 3 | ||||
| 4 | ||||
| 5 | ||||
| 6 | ||||
| 7 | ||||
| 8 | ||||
| 9 | ||||
| 10 | ||||
| 11 | ||||
| 12 | ||||
| 13 | ||||
| 14 | ||||
| 15 |
Matching group names share a color. X and Y accept negative values, decimals, and repeated coordinates.
Chart.js Code Example
JAVASCRIPTimport Chart from 'chart.js/auto';
// Illustrative data used by the live preview.
const chartData = {
"pointLabels": {
"name": "Group",
"x": "Performance Score",
"y": "Satisfaction Score"
},
"datasets": [
{
"label": "Team A",
"data": [
{
"x": 85,
"y": 78
},
{
"x": 92,
"y": 85
},
{
"x": 88,
"y": 82
},
{
"x": 75,
"y": 70
},
{
"x": 95,
"y": 90
}
],
"backgroundColor": "#8b5cf6",
"borderColor": "#8b5cf6",
"pointRadius": 6,
"pointHoverRadius": 8
},
{
"label": "Team B",
"data": [
{
"x": 70,
"y": 65
},
{
"x": 80,
"y": 75
},
{
"x": 65,
"y": 60
},
{
"x": 90,
"y": 88
},
{
"x": 78,
"y": 72
}
],
"backgroundColor": "#06b6d4",
"borderColor": "#06b6d4",
"pointRadius": 6,
"pointHoverRadius": 8
},
{
"label": "Team C",
"data": [
{
"x": 82,
"y": 79
},
{
"x": 76,
"y": 68
},
{
"x": 89,
"y": 86
},
{
"x": 93,
"y": 92
},
{
"x": 87,
"y": 81
}
],
"backgroundColor": "#f59e0b",
"borderColor": "#f59e0b",
"pointRadius": 6,
"pointHoverRadius": 8
}
]
};
function createConfig(chartData) {
let chartType = 'bar';
let options = {
responsive: true,
maintainAspectRatio: false,
plugins: {
legend: {
position: 'bottom',
},
tooltip: {
mode: 'nearest',
intersect: false,
},
},
};
chartType = 'scatter';
const labels = chartData.pointLabels;
// Large legends can consume the entire canvas. Groups remain in point tooltips and the table.
options.plugins.legend.display = chartData.datasets.length <= 8;
options.scales = {
x: {
type: 'linear',
position: 'bottom',
title: { display: true, text: labels.x },
},
y: {
title: { display: true, text: labels.y },
},
};
options.plugins.tooltip.callbacks = {
label: (context) => `${labels.name}: ${context.dataset.label}, ${labels.x}: ${context.raw.x}, ${labels.y}: ${context.raw.y}`,
};
return { type: chartType, data: structuredClone(chartData), options };
}
const chart = new Chart(document.getElementById('myChart'), createConfig(chartData));Preview and code follow the same library selection.
Run This Example
Install the package below in a browser project such as Vite. Put the copied code in a client JavaScript module and add this container to the page before the module runs.
npm install chart.js@4.5.1<div style="height:320px"><canvas id="myChart"></canvas></div>The example includes its sample data. When removing the chart, destroy or dispose of its instance and disconnect any resize observer.
Reading This Example
The default Chart.js example contains 15 illustrative points, five each for Team A, Team B, and Team C. Higher x values generally accompany higher y values. Team A includes the point (95, 90); the plotted association alone does not explain why the values move together.
All library tabs use these illustrative values. Rendering styles and library APIs differ, so use the table to compare exact numbers.
About this example & sample data
| Observation | X Value | Y Value |
|---|---|---|
| Team A 1 | 85 | 78 |
| Team A 2 | 92 | 85 |
| Team A 3 | 88 | 82 |
| Team A 4 | 75 | 70 |
| Team A 5 | 95 | 90 |
| Team B 1 | 70 | 65 |
| Team B 2 | 80 | 75 |
| Team B 3 | 65 | 60 |
| Team B 4 | 90 | 88 |
| Team B 5 | 78 | 72 |
| Team C 1 | 82 | 79 |
| Team C 2 | 76 | 68 |
| Team C 3 | 89 | 86 |
| Team C 4 | 93 | 92 |
| Team C 5 | 87 | 81 |
READ THE CHART
Look for Relationships Between Variables
A scatter plot places each observation using two numeric values. The pattern of points can reveal an association, clusters, unusual observations, or a relationship that changes across the range.
Pair the Measurements
Each point must use two measurements from the same observation. Name both axes and include units. Color or shape can distinguish groups, but the x and y positions should carry the main comparison.
Describe the Pattern
Look for direction, curvature, spread, and separate clusters. A narrow rising band suggests a positive association. A broad cloud is less predictable. Check groups separately before describing a pattern in the combined data.
Avoid Causal Claims
An association does not establish that one variable causes the other. A third variable, a sampling choice, or a shared trend can explain the pattern. Investigate unusual points before removing them.
Handle Crowded Data
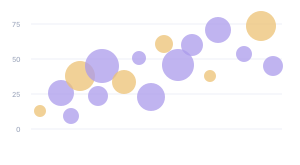
Use smaller points and transparency when observations overlap. For very dense data, consider a heatmap of binned counts. Use a bubble chart only when a third numeric measure adds useful information.
KEEP EXPLORING